基于jQuery实现左右图片轮播(原理通用)
2015-12-25 09:35作者:fang
本文为大家分享了jQuery实现左右图片轮播代码,供大家参考,具体实现内容如下
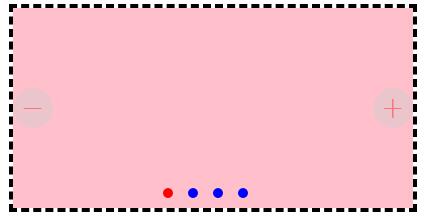
运行效果图:
重点!!!
实现原理:
通过判断index值的大小变化来判断图片左移还是右移。通过控制图片的left值,来达到一个轮播的效果。
具体代码:
<!DOCTYPE html>
<html>
<head>
<meta charset="utf-8">
<title></title>
</head>
<script src="js/jquery.min.js"></script>
<style>
.banner{
margin:0 auto;
border: 4px dashed black;
width:400px;
height:200px;
position: relative;
overflow:hidden;
}
.banner a{
z-index: 100;
display: block;
width:100%;
height: 100%;
position: absolute;
left:100%;
top:0;
}
.banner .first{
left:0;
}
.banner a img{
width:100%;
height: 100%;
}
.choose{
z-index: 1000;
position: absolute;
left:150px;
top:180px;
width:100px;
height: 10px;
}
.choose span{
margin-right: 15px;
float: left;
display:block;
background: blue;
width:10px;
height: 10px;
border-radius: 10px;
}
.choose span:hover{
background: red;
}
.choose .red{
background: red;
}
.banner .pre,.next{
cursor:pointer;
text-align:center;
border-radius:20px;
display:block;
background:#cccccc;
opacity:0.4;
text-decoration: none;
z-index: 200;
display:block;
width:40px;
height: 40px;
font-size: 40px;
color:red;
position: absolute;
top:80px;
}
.banner .pre{
left:0px
}
.banner .next{
right: 0px;
}
</style>
<body>
<div class="banner">
<!--
这里为上一页下一页点击按钮
-->
<span class="pre">-</span>
<span class="next">+</span>
<!--
此处为轮播主体,颜色块代替。图片自加
-->
<a href="###" class="first" style="background: pink;"></a>
<a href="###" style="background: blue;"><img src="images/banner1.jpg"/></a>
<a href="###" style="background: greenyellow;"><img src="images/banner2.jpg"/></a>
<a href="###" style="background: deepskyblue;"><img src="images/banner3.jpg"/></a>
<!--
此处为轮播部分下方小点选择
-->
<div class="choose">
<span class="red"></span>
<span></span>
<span></span>
<span></span>
</div>
</div>
<script>
/*定义两个变量,保存当前页码和上一页页码*/
var $index=0;
var $exdex=0;
/*小点的鼠标移入事件,触发图片左移还是右移*/
$(".choose span").mouseover(function(){
//获取当前移入的index值
$index=$(this).index();
//首先让点的颜色变化,表示选中
$(".choose span").eq($index).addClass("red").siblings().
removeClass("red");
//判断如果index变小,证明图片要往左移动。变大则为右移
if($index>$exdex){
next();
}else if($index<$exdex){
pre();
}
//移动完毕将当前index值替换了前页index
return $exdex=$index;
});
//下一页的点击事件。在右移基础上加了最大index判断
$(".next").click(function(){
$index++;
if($index>3){
$index=0
}
$(".choose span").eq($index).addClass("red").siblings().
removeClass("red");
next();
return $exdex=$index;
});
//上一页的点击事件
$(".pre").click(function(){
$index--;
if($index<0){
$index=3
};
$(".choose span").eq($index).addClass("red").siblings().
removeClass("red");
pre();
return $exdex=$index;
});
//加个定时器,正常轮播
var atime=setInterval(function(){
$(".next").click();
},1000);
//这里为右移和左移的事件函数。
//右移基本原理就是先让exdex定位的left左移百分百,而选中的当前页从屏幕右边移入,left变为0
function next(){
$(".banner a").eq($index).stop(true,true).
css("left","100%").animate({"left":"0"});
$(".banner a").eq($exdex).stop(true,true).
css("left","0").animate({"left":"-100%"});
}
function pre(){
$(".banner a").eq($index).stop(true,true).
css("left","-100%").animate({"left":"0"});
$(".banner a").eq($exdex).stop(true,true).
css("left","0").animate({"left":"100%"});
}
</script>
</body>
</html>
以上就是本文的全部内容,帮助大家实现一个简单大方的图片轮播效果。